What is Texture? TexturePage
Element of Art: Texture:
PDF Texture Template
To be completed by the student.
6 steps:
1. pick a textured animal or person with a lot of wrinkles, beard or scrunched face for texture and draw on light colored construction paper.
2. outline the lines in chalk
3. Add 2-3 coats of Tempera on everywhere but the chalk
4. add india ink
5. rinse
6. embellish with more color
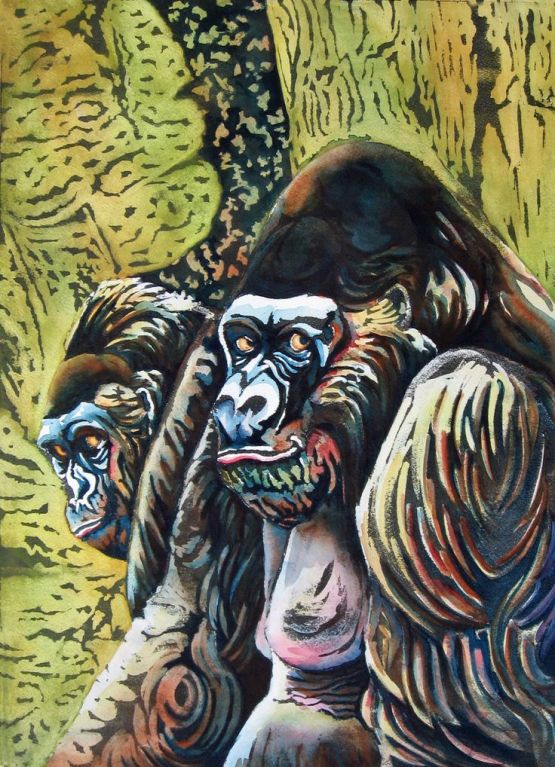
Professional Artist who uses this technique
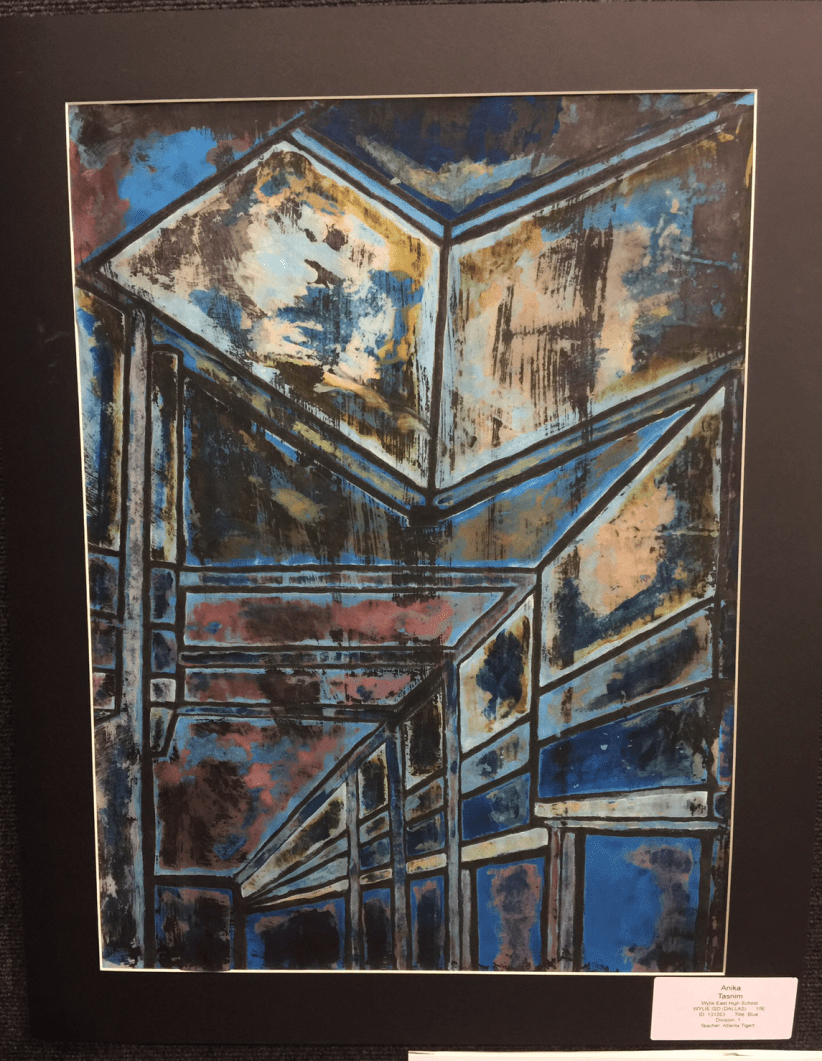
Student who created his AP Portfolio using this technique
Tempera Resist with Permanent Ink Instructions
Objective: The student will re-discover an old method of creating a painting used in which they will apply tempera paint and cover the composition with permanent ink.
Materials:
Art history reproductions of famous(highly recognizable art)
Quality, pastel colored construction paper
11” X 17”
Black India Ink (may also use permanent colors such as red,
turquoise, blue, green, etc)
Quality liquid tempera paints in a variety of colors
Soft brushes, medium size
Water
Large sink or large, flat plastic container
Pitcher or bottles to pour water if a sink is not handy
Vocabulary:
Value Color harmony Highlights Contrast Spacing Composition
Permanent Ink Diagonals, horizontals and verticals
Procedures:
The students will take a large piece of thick construction paper
and draw a composition on it using a #2 pencil
The composition may be an abstract, non-objective or realistic
design from life or a photo they have taken.
The composition may also be determined by using a view finder
on top of a picture or work of art and cropping the design
as a smaller portion of the original work.
The student will begin applying layers of liquid tempera paint on
the composition making sure they leave the paper raw between changes of colors
(Example) Paint one area. Begin painting another area but leave a small space between
the two colors where the paper will have NO PAINT. (this can also be achieved with chalk)
Do this throughout the entire painting.
The student will make sure they have 2 – 3 layers of paint on
each painted spot.
After the composition has dried completely, the student will take
a smooth, medium to large soft brush and apply one good coverage of permanent ink
such as black India Ink. (You may substitute colored permanent inks as well)
The student will wait until the ink has dried (10 – 15 minutes)
and then place the painting either in a large sink or flat container.
The student will then run water slowly over the painting. If a
sink is not available, pour water on the painting.
(I recommend using the sink downstairs during 4th period, it has a spray nozzle)
The student will use their hands or fingers to begin rubbing the
top of the inked painting to release some of the ink. The more rubbing, the more the
paint releases the ink. Pouring fresh water over the painting will clean the dirty water
off of the painting and expose the true colors left.
The student will lay the wet painting carefully on a piece of
newspaper and place both newspaper and painting on the dry rack to dry for 24 hours.
Criteria for Evaluation:
Did the student follow directions when applying layers of paint, leaving spaces between colors?
Did the student apply the ink and remove it properly?
Did the student create a strong composition in tempera resist?
Did the student create a strong contrast within the painting?
Did the student complete the assignment with good craftsmanship?
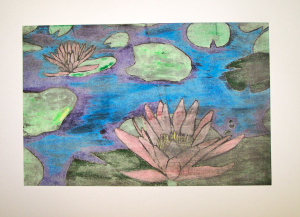
Middle schoolers from previous years: observational still life.

Best of show Middle school (6-8th grade) FBA